
Wood-n’t You Know It?
When you think Christmas crafts, Christmas tree baubles and ornaments probably come to mind first. They’re easy to customise, look great, and can make wonderful gifts or be turned into a fun family activity. And while spherical baubles are the more common kind, you can easily create something pretty unique with flat wooden baubles.
For example, did you know you can print your own designs onto Siser® EasyColor™ DTV™ (direct to vinyl) and apply it to a wooden ornament using a heat press or an iron? Wooden ornaments are perfect for heat transfer vinyls, because they’re able to withstand high temperatures.
Below is all you need to get you started.
Materials used:
- Wooden ornament
- Siser® EasyColor™ DTV™
- Siser® EasyColor™ Mask
- Ribbon and cardstock for optional touches
Tools used:
- Inkjet printer
- Siser® EasyWeeder®
- Siser® Cutting Mat
- Siser® Juliet™ or Romeo™
- Siser® Heat Press or an iron
- Heat Transfer Sheet or baking paper

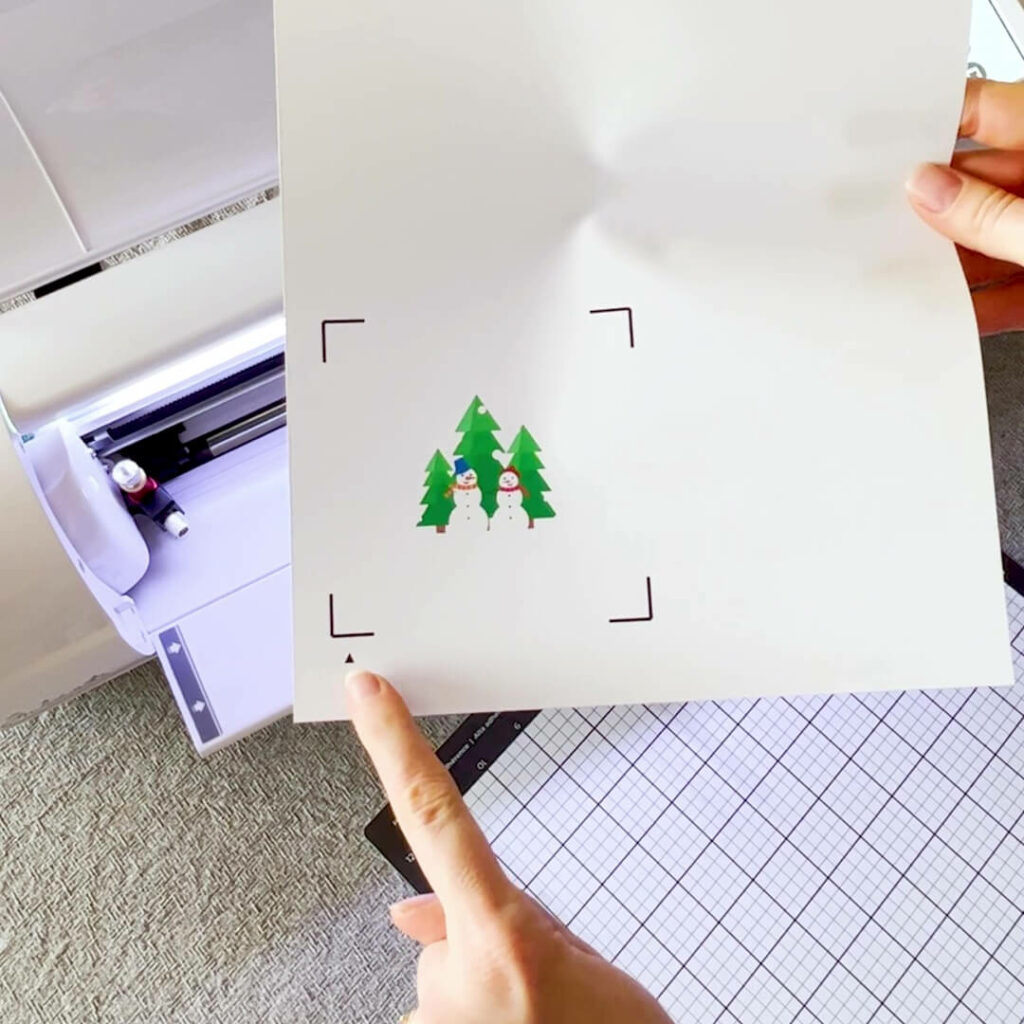
Setting up your design to print in Leonardo™ Design Studio is simple – just make sure you have ‘Print and Cut’ or ‘Editable Artwork’ selected when you import your image. After going through your preferences, your design will import with registration marks around the edge. These are crucial for the print and cut process, because they’re what your Siser® cutting machine uses to determine where to cut! If your design is too large to print, you’ll know because the registration marks will be red, so simply scale down or reposition your design until the registration marks turn black and fit within the alignment guides.
From here, you can send your design to print. EasyColour™ DTV™ only works on inkjet printers – sorry laser printer users! – so make sure you have the correct kind before printing. It’s also important that you print on the correct side. You’ll want your print on the white side, not the grey side (that’s the backing sheet), so check you have your sheet orientation the right way up in your printer. It’s a very easy mistake to make!
And once the design is printed, simply load it into your Siser® cutting machine, being mindful to position the blade just inside the corner registration mark with the little arrow. This is where your machine works its magic. The live camera in your machine will then detect all the registration marks before it begins cutting. If there’s a problem with the alignment at all or your machine can’t detect your registration marks, it won’t cut, so make sure you have your blade positioned correctly within that corner registration mark.
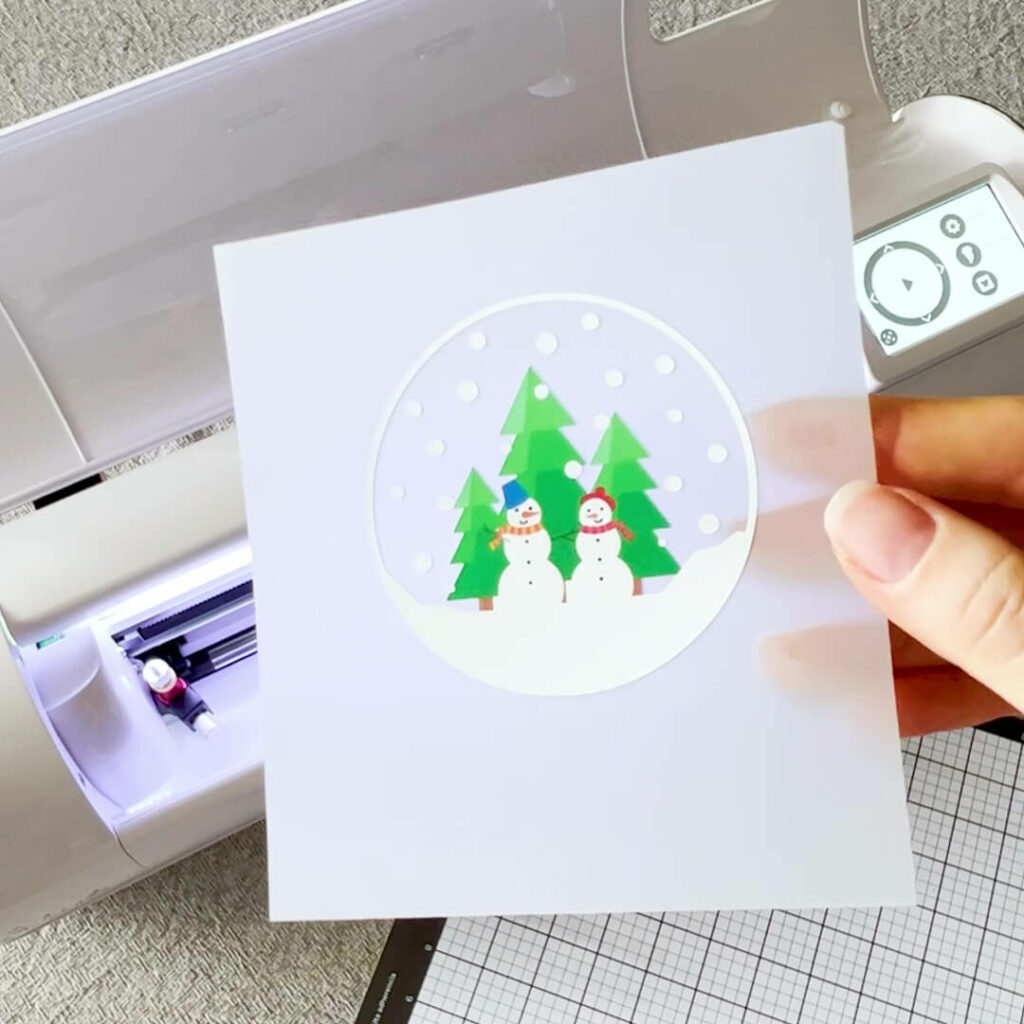
But if everything goes smoothly, you can unload your design and get weeding. EasyColor™ DTV™ sheets have a soft, almost rubbery matte feel to them, and they weed like a dream. And it’s incredibly impressive how precisely the Siser® machines can cut – they make the weeding process so easy!
One final step before you can apply your design is to transfer it to an EasyColor™ Mask sheet. This is because EasyColour DTV comes with a thick backing on it that needs to be removed (that’s the grey sheet). Plus, EasyColor™ Mask sheets act as a protective barrier between your heat surface and your design to prevent it from melting. It’s super easy to apply – simply place it over the top of your design and then rub over the surface using a scraper tool, brayer, or squeegee to ensure it adheres properly. From there, flip it over and remove the grey backing sheet. If some of your design lifts, flip it back over and give it another good rub on the trouble area.
And now it’s time to add heat! Position your design in place on your wooden ornament and get pressing. Whether you’re using a Siser® Heat Press or an iron, cover your material with a Heat Transfer Sheet or baking paper and apply medium pressure for 15 seconds at 155°C. EasyColor™ DTV™ is warm peel heat transfer vinyl, meaning you have to wait a few minutes for the design to cool down before removing the EasyColour™ Mask sheet. If the design lifts anywhere at all, put the EasyColour Mask sheet back in place and press for another 5-10 seconds, remembering to wait for the design to cool down again before attempting to remove the Mask sheet.
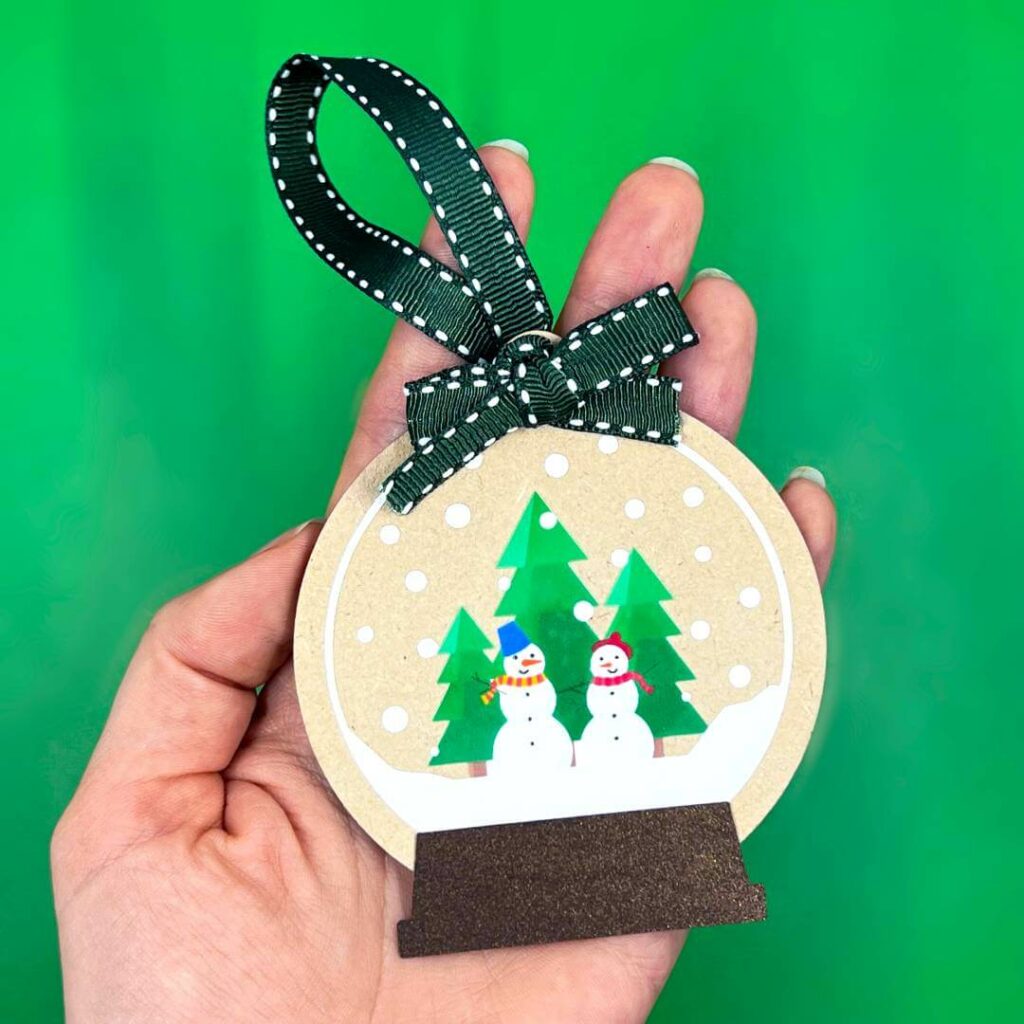
And then you’re done! For a finishing touch, you can add some ribbon to the top or use cardstock to add some additional features. This snow globe design features a complementary green ribbon and a cardstock base to create a 3D effect.
Being able to apply EasyColour™ DTV™ to wood is such a game changer!


